DigitalOcean + Dokku + Meteor
So for two weeks now I’ve been running Dokku on DigitalOcean for my Meteor apps (and some old PHP apps as well).
I’ve read a few guides about it, but I feel they all leave something out so I’ll try to collect everything I’ve learned so far about the subject.
What is Dokku?
Docker powered mini-Heroku. The smallest PaaS implementation you’ve ever seen.
Run docker containers without knowing Docker, push code via git and support for buildpacks. It’s great!
The hard choice
First of all you want a domain to use for easier app control, let’s use apps.example.com as our base and *.apps.example.com for our apps. Say we deploy an app called test, it would get the domain test.apps.example.com. We can of course add more domains later on, for example test.com. Choose a domain and we’ll get back to this later.
Creating the server
The DigitalOcean part is kind of straight forward. Sign up ($10 free credit) and go to Create droplet. Pick a name for your droplet, for example my-dokku, choose a size and a region. Click on Applications and choose Dokku.
We do want add an SSH key for this droplet, if you’re not familiar with SSH keys I suggest reading https://www.digitalocean.com/community/tutorials/how-to-set-up-ssh-keys—2. Don’t skip this step since you will have to read it later anyway and you will have trouble with pushing your application to Dokku.
Add your key and select it, then click on “Create droplet”
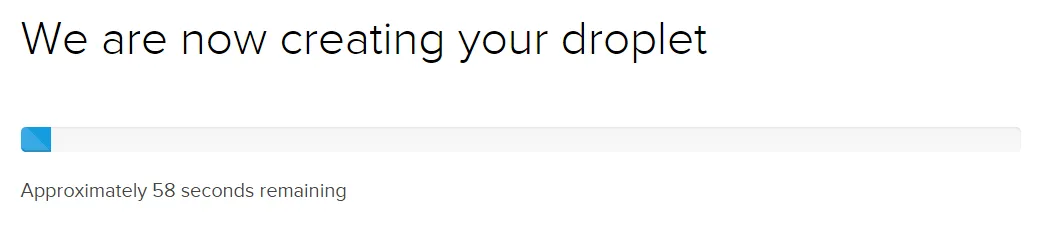
After the image is created you’ll see the dashboard for your droplet. Here we can control our droplet such as power it off, remove it, take snapshots, and resize it. The important part here for now is the IP address. The one I got was 188.166.29.28

Configure domain
Now what I did was to point the domains we previously talked about to this IP address. In my case it looked like this:
188.166.29.28 *.apps.example.com
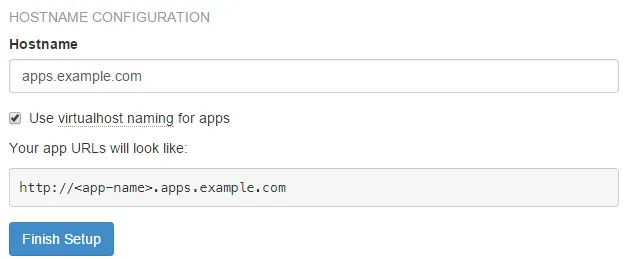
188.166.29.28 apps.example.comAfter this is done I point my browser to http://apps.example.com to continue with the Dokku setup. Since I’ve already added my SSH public key it’s already filled out by Dokku. Fill in apps.example.com under Hostname and click Use virtualhost naming for apps. Click Finish setup and we’ll move on to the next step. You will here be redirected to the Dokku documentation for deploying the heroku node test app. Let’s ignore this for now and move on to deploying our first Meteor application
MongoDB + dokku = true
Before we actually deploy our app we need to add a MongoDB-container to our Dokku installation. SSH to apps.example.com using the SSH public key we created before. Run the following commands to install the MongoDB-plugin:
git clone https://github.com/jeffutter/dokku-mongodb-plugin.git /var/lib/dokku/plugins/mongodb
dokku plugins-install
This might take a while since MongoDB has to be installed. If you want to read more about the plugin please see the Github repository at https://github.com/jeffutter/dokku-mongodb-plugin
First we need to start the MongoDB-instance. Do this with dokku mongodb:start. Now let’s create a db for our app, the one called test with dokku mongodb:create test.
Your first application
Put your SSH session aside and let’s go back to our development. Let’s use the Todos demo for Meteor
meteor create --example todos test
cd test
meteor
This will start our Meteor application. We don’t really need to but make sure everything works by going to http://localhost:3000.
Now we just need one more thing before we push our application to our Dokku installation, to tell Dokku how to build our application. Dokku doesn’t really know it’s a Meteor application but there is an easy way called buildpacks which instructs Dokku what it should do with the code we are sending.
Create a new file called .env in your root directory with the contents export BUILDPACK_URL='https://github.com/AdmitHub/meteor-buildpack-horse.git'. Dokku will then use this buildpack to compile and run our application.
Deploying
Now we just need to initialize a repository and push it to Dokku.
git init
git add .
git commit -m "initial commit"
git remote add dokku dokku@apps.example.com:test
git push dokku master
Let’s break it down. git init creates a local git repository. git add . stages all files in our directory and git commit -m "intial commit" creates a commit with the message initial commit. git add and git commit is probably the commands I use most when working with git.
git remote add dokku dokku@apps.example.com:test tells us we have a remote destination called dokku and dokku@apps.example.com:test is the destination. test is what your app will be called later, in this case test.apps.example.com. git push dokku master pushes our HEAD to the remote location.
Your first deploy will fail since we have no ROOT_URL set which Meteor needs (Error: Must pass options.rootUrl or set ROOT_URL in the server environment). Go back to your SSH session and type dokku config:set test ROOT_URL=http://test.apps.example.com. This will the ROOT_URL and we can deploy again. We will not be needing to do this again. Also note in the build logs that MONGO_URL is set without us doing anything. If you want to run seperate MongoDB-servers you can set this value the same way as the ROOT_URL.
To deploy again just run git push dokku master
So, now we can visit http://test.apps.example.com to see our app in all it’s glory.
If you read the build logs you will notice the process stating it waits 35 seconds until finalizing your deploy. This is because we don’t have any checks, but let’s add that. In your project root create a file called CHECKS. In this put the following content:
/ Todos - All your todos synced wherever you happen to beThis will check our website root for the text Todos - All your todos synced wherever you happen to be, if it’s not there Dokku will abort the deploy.
Updating your application
Now, add the file to git with git add CHECKS and commit it with git commit -m "added CHECKS file". Now you can push it to Dokku again with git push dokku master. Now you’ve also learned how to update your application!
Let’s hook up our main domain, test.com. Point it to the same IP address as before.
Now in your SSH session type dokku domains:add test test.com where the first test is the name of our application. www.test.com will be added as well. Finally, change your ROOT\_URL to our new domain with dokku config:set test ROOT_URL=http://test.com. As you can see Dokku runs our CHECKS file here as well. Visit http://test.com and enjoy the fruits of your hard work.
In action
What now?
You most likely want to add a swap drive to your host to offload the RAM when the usage is high. See this excellent guide by Justin at https://www.digitalocean.com/community/tutorials/how-to-add-swap-on-ubuntu-14-04